Running pfSense on a DigitalOcean droplet
I love pfSense (and opnSense, no discrimination here).
I use it for just about anything, from homelab to large scale deployments and I'll give out on any fancy <enter brand name fw appliance here> for a pfSense setup on a decent hardware.
I also love DigitalOcean, if you ever used them, you know why, if you never did, head over and try, you'll understand why.
<shameless plug: head over to JupiterBroadcasting.com, other then the *best* technology content out there, they have coupon codes to get you started with DO>.
Unfortunately, while DO offers tremendous amount of useful distros and applications, pfSense isn't one of them. But, where there's a will, there's a way, and here's how to get pfSense up and running on DO so you can have it as the gatekeeper to your kingdom.
Start by creating a FreeBSD droplet, choose your droplet size (for modest setups, I find the 5$ to be quite awesome):
Based on your need, add additional internal NIC (private networking), set your SSH keys, name the droplet, and off you go.
Once the droplet is ready, SSH into it.
We'll download the installation
image of pfSense. Latest installation media can be found at
https://www.pfsense.org/download/, you'll want to grab the usb memstick
image. Copy the download URL (right click on that big red button).
Simply curl -O the install media:
GEOM will prevent us for writing to the raw block device, we need to enable debug flag to do so (many kuduz to Tubsta and his excellent post for providing this info).
We're now ready to slap the installation image onto the raw block device (/dev/vtbd0), naturally, using dd:
We're done with the first stage, it's time to reboot the machine and
fire up the HTML5 console from your DigitalOcean dashboard. If all went
well, you should be greeted with pfSense installer and a nice warm feeling inside your heart.
You might be tempted to rush off and start the installation, but hold on, that won't work:
Due to our shenanigans with slapping an image onto /dev/vtbd0 the gpt table is all messed up (i.e Corrupted). pfSense installer will refuse (and rightfully so) to install in such state. we need to fix this.
For that, we'll need to drop to the rescue shell and issue the gpart recover command:
Now we're all set to continue.
Exit the shell and continue the installation. Initiate the installation and select the manual disk partitioning option:
We need to remove all the existing partitions with the exception of vtbd0p3, which is our installation media, trying to remove it will yield a "Device Busy" message.
We need to create root partition on the disk. For the sake of this post, I'll just use everything as /, but in production you probably want to consider disk partitioning that suite your needs and intended setup.
You will be asked by the installer to approve setting the bootable flag
on this partition, go a head and do so, after all, you do want it to
boot up.
Now, we can press Finish and commit our changes:
This will initiate the installation process, it should be quite quick, if all goes acording to plan, you should be notified with a polite message indicating we're finished.
If there are modifications you'd like to do, go ahead and do them, I usually skip this part by answering no, which will (hopefully) reboot your newly installed pfSense installation....
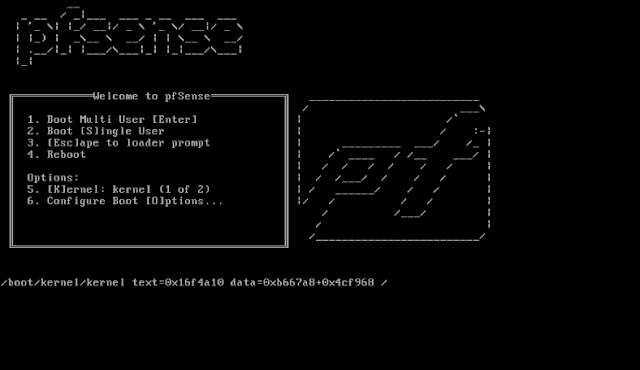
Now it's time to cross your fingers/say your prayers/knock on wood/pet your magic cat and hope really really good you've been a good boy/girl this year, because if you did, you'll be greeted with pfSense boot menu!
That's basically it, let the boot process run its course, and you'll be faced with the initial setup screen:
Once done, you'll have a pfSense running on DO droplet and a warm fuzzy feeling of accomplishment.
There are many useful things you can do with pfSense on your droplet, from OpenVPN, squid, firewalling, fancy routing, url filtering, dns black listing and much much more.
You have two ways to initiate the initial setup wizard of the web-configurator:
- Spin up another droplet, log into it and browse your way to the INTERNAL
ip address of the internal NIC you've set up. This is the long and
tedious way, but it's also somewhat safer as it eliminates the small
window of risk the second method poses.
or - Once your WAN address is all setup, your pfSense is ready to accept https connection to start the initial web-configurator setup.
Thing is, there's a default, well known set of credential to this initial wizard (admin:pfsense), so, there is a slight window of opportunity that someone can swoop in (assuming they know you've installed pfsense + your wan IP address + the exact time window between setting up the WAN interface and completing the wizard) and do <enter scary thing here>.
Hopefully this was helpful for someone, I hope to get a similar post soon detailing how to get FreeNAS up and running on DO.
Many thanks to Tubsta and his blogpost as well as to Allan Jude, Kris Moore and Benedict Reuschling for their AWESOME and inspiring podcast, BSD Now.


